What is a Starter Kill Relay – How Does It Work?
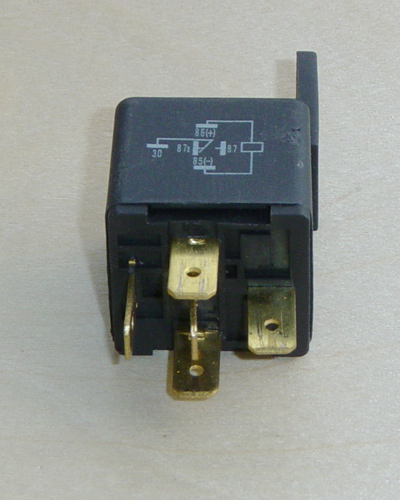
Defining a Starter Kill Relay Simply put, a starter kill relay is an anti-theft electrical switch that integrates directly with the alarm system of…


Defining a Starter Kill Relay Simply put, a starter kill relay is an anti-theft electrical switch that integrates directly with the alarm system of…
In my experience with electrical circuits, understanding the nuances between a single pole double throw relay and a double pole double throw relay can…
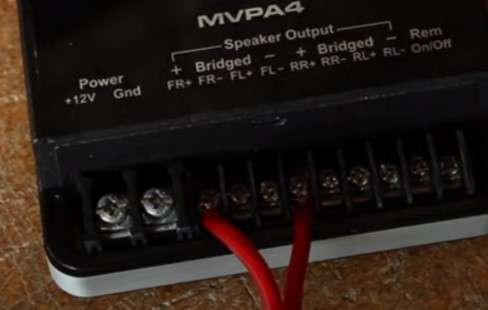
Car Audio Troubleshooting Guide Car Audio Troubleshooting Guide Select the issue you’re experiencing with your car audio system to get started: Select Your IssueNo…

As a seasoned expert in vehicle security, I’ve encountered my fair share of frustrations with remote start systems. Few things are as disconcerting as…

As an ardent advocate of vehicular security, I swiftly learned that even the most reliable systems, like my car’s Viper alarm, could succumb to…

Installing a Viper 5706 Alarm System in your vehicle is a great way to enhance its security and provide peace of mind. Whether you’re…
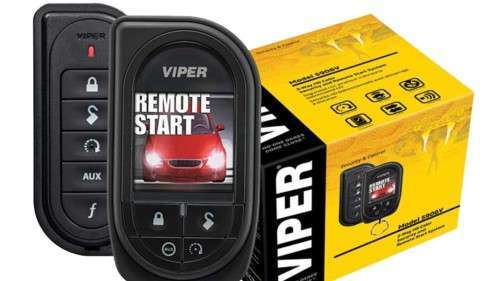
Viper 5906V Review – The Viper 5906V is one of the best products in the line of remote start alarm systems available from Viper.

If you’re passionate about keeping your car in top-notch condition, then you know that a regular wash just doesn’t cut it. It’s time to…

Introduction – Getting Started If you’re the proud owner of a sleek black car, you know how stunning it can look when it’s freshly…